

True exterior winterization goes beyond simply wrapping pipes and cleaning gutters; it requires a systematic approach to identifying and sealing micro-vulnerabilities in your home's envelope that standard checklists miss. While basic preparation focuses on immediate freeze prevention, advanced winter prep involves addressing porous materials, drainage gradients, and structural weak points that suffer cumulative damage from freeze-thaw cycles. Ignoring these "invisible" maintenance tasks can lead to catastrophic failures—such as slab leaks, brick spalling, and compromised insulation—often resulting in repair bills ranging from $500 to over $10,000.
Quick Summary: The 10 Overlooked Tasks and Their ROI
If you are looking to move past cosmetic maintenance and ensure structural integrity this winter, these are the ten critical areas seasoned inspectors check, but homeowners often miss:
- Clear Brick Weep Holes: Ensuring wall cavities can breathe.
- Seal Expansion Joints: Preventing water infiltration in concrete slabs.
- Regrade Soil: Stopping hydrostatic pressure against the foundation.
- Lubricate Garage Weatherstripping: Preventing brittle failure and drafts.
- Replace Exterior Gaskets: Sealing light fixtures and outlets.
- Secure Vent Flaps: Preventing pest entry and heat loss at dryer vents.
- Test Vacuum Breakers: Checking the fail-safe on frost-free faucets.
- Inspect Channel Drains: Clearing debris from hardscape drainage.
- Install Smart Freeze Sensors: Moving to active monitoring.
- Structural Pruning: Trimming for weight distribution, not just aesthetics.
Prevention Cost vs. Estimated Repair Bill
The return on investment for proactive winterization is substantial. The following table outlines the estimated DIY cost of materials versus the potential professional repair bill if the task is neglected.
| Overlooked Task | DIY Prevention Cost | Potential Repair Bill (Risk) | Damage Type |
|---|---|---|---|
| Sealing Expansion Joints | $40 - $60 (Polyurethane Caulk) | $3,000 - $8,000 | Foundation heaving/cracking |
| Clearing Weep Holes | $0 (Wire/Compressed Air) | $1,500+ | Mold in walls/Brick spalling |
| Regrading Soil | $50 (Topsoil/Shovel) | $5,000 - $15,000 | Basement leaks/Foundation shift |
| Replacing Gaskets | $15 (Foam gaskets) | $300 - $500 | Short circuits/Rotting siding |
| Structural Pruning | $0 - $100 (Tools) | $1,000 - $5,000 | Roof impact/Power line damage |
| Testing Vacuum Breakers | $10 (Replacement kit) | $400 - $800 | Burst internal pipe |
The Difference Between Cosmetic and Structural Winter Prep
Understanding the distinction between cosmetic and structural preparation is vital for long-term home health.
- Cosmetic Winter Prep* involves tasks that maintain the visual appeal of the property or handle surface-level debris. Examples include raking leaves, covering patio furniture, and cleaning exterior windows. While necessary for curb appeal, these tasks do little to protect the building's physics.
- Structural Winter Prep focuses on water management and thermal envelope integrity*. This includes diverting bulk water, sealing air leaks, and preventing ice formation inside porous materials. Structural prep protects the capital investment of the home by preventing the physical degradation of building materials.
Why Standard Checklists Fail
Standard winterization checklists fail because they rely on visible cues—like a pile of leaves or a dripping faucet. However, the most expensive winter damage occurs in areas that are "out of sight, out of mind."
Most homeowners assume that if they have "frost-free" hose bibbs, they are safe. They fail to realize that if the internal washer is corroded, water remains in the stem, freezing back into the wall cavity. Similarly, many assume that concrete is impermeable, ignoring the fact that unsealed expansion joints act as funnels for water to reach the foundation footing. True preservation requires a mindset shift from "cleaning up" to "locking down."
The Science of Freeze-Thaw Cycles on Neglected Porous Materials
The primary enemy of exterior materials is the freeze-thaw cycle. When water enters a porous material like concrete, brick, or wood and subsequently freezes, it expands by approximately 9%.
If this expansion occurs within a confined space—such as a hairline crack in your driveway or the pores of a brick—it exerts hydraulic pressure exceeding 2,000 psi. This pressure exceeds the tensile strength of masonry, causing spalling (flaking off of the surface) and micro-cracks. Over a single winter, repeated cycles widen these cracks, allowing more water to enter next time, accelerating the destruction.
Texas Home Remodeling ROI and Avoiding Depreciation
In regions with volatile weather patterns, such as Texas, avoiding depreciation is just as important as increasing value through renovation. Neglecting the building envelope leads to "deferred maintenance," which is the fastest way to kill your property value.
According to recent market analysis, homes with documented maintenance of structural systems retain significantly higher value. For a deeper dive into how maintenance impacts your bottom line and future project planning, review the Texas Home Remodeling Roi The Definitive Analysis Action Plan For 2025. This data emphasizes that the highest ROI often comes from preserving what you already have.
Phase 1: Advanced Foundation and Hardscape Defense
The foundation is the most critical and expensive component of your home. This phase focuses on managing water flow around the base of the structure to prevent shifting and heaving.
Task 1: Clearing and Inspecting Brick Weeping Holes for Airflow
Weep holes are the vertical gaps in the bottom course of your brick veneer. They serve a dual purpose: draining water that penetrates the brick and allowing air to ventilate the cavity behind the wall.
- The Check: Use a stiff wire or compressed air to clear dirt, insect nests, and debris from these slots.
- The Risk: If blocked, trapped moisture can freeze, popping the brick faces off or causing mold growth on the interior drywall.
Task 2: Sealing Expansion Joints in Driveways and Patios
Expansion joints (the felt or wood strips between concrete slabs) eventually rot away, leaving a gap.
- The Fix: Remove the old material, insert a backer rod (foam rope), and seal with a high-quality self-leveling polyurethane sealant.
- Why: This prevents water from flowing under the slab, saturating the soil, and heaving the concrete when it freezes.
Task 3: Regrading Soil to Prevent Hydrostatic Pressure on Foundations
Soil often settles near the foundation over the year, creating a "negative grade" that funnels water toward the house.
- The Strategy: Add heavy soil (clay/topsoil mix) to create a slope that drops at least 6 inches over the first 10 feet away from the foundation.
- The Science: This reduces hydrostatic pressure—the weight of water pushing against your basement or slab walls—which is a leading cause of winter leaks.
Phase 2: The Envelope and Micro-Penetrations
Your home's "envelope" is the barrier between the conditioned interior and the harsh exterior. Small gaps here lead to massive energy loss and moisture intrusion.
Task 4: Lubricating and Sealing Garage Door Weatherstripping
The rubber seal at the bottom of your garage door can freeze to the ground or become brittle and crack in low temperatures.
- The Action: Clean the seal and apply a silicone-based lubricant (spray) to keep the rubber pliable.
- Check Alignment: Ensure the seal compresses fully against the floor. If you see light coming through, cold air is rushing in.
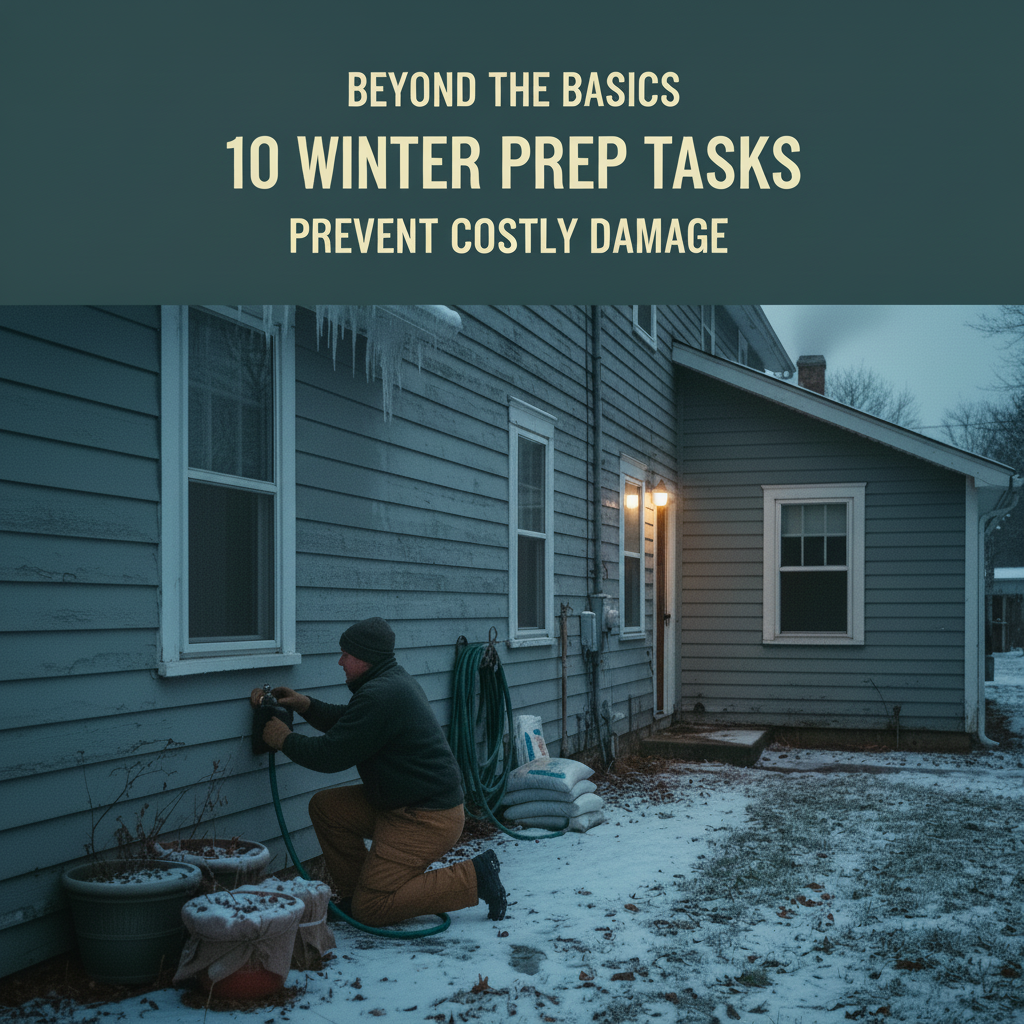
Task 5: Replacing Brittle Gaskets on Exterior Lights and GFCI Outlets
Exterior fixtures have foam gaskets that degrade due to UV exposure and heat.
- The vulnerability: A failed gasket allows water to run behind the fixture and into the electrical box, risking short circuits and fire hazards.
- The Fix: Unscrew the fixture, scrape off the old gasket, and install a universal foam gasket or apply a bead of clear outdoor silicone.
Task 6: Cleaning and Securing Exterior Dryer and Exhaust Vent Flaps
Lint buildup combined with condensation can freeze a dryer vent flap shut or prop it open.
- Stuck Open: Allows cold air and rodents to nest inside the warm vent.
- Stuck Closed: Creates a fire hazard and forces moisture back into the home.
- Maintenance: Clean the lint thoroughly and ensure the flapper moves freely.
Phase 3: Plumbing and Smart Monitoring Integration
Modern winterization merges mechanical checks with technology. Plumbing failures are the most common insurance claim during freezing weather.
Task 7: Testing Vacuum Breakers on Frost-Free Hose Bibbs
The vacuum breaker is the cap on top of your hose bibb that prevents backflow.
- The Test: Run water and turn it off. You should hear a quick release of water/air. If it leaks continuously or sprays, the internal plunger is broken.
- Consequence: A faulty breaker can trap water in the "frost-proof" stem, causing it to burst deep inside the wall.
Task 8: Inspecting Channel Drains and Catch Basins for Obstructions
Channel drains (often found in driveways or patios) are critical for moving melting snow away from the home.
- The Issue: These often fill with sludge in the fall. If clogged, water pools, freezes, and creates a slip hazard or floods the garage.
- The Task: Remove the grate and scoop out the catch basin sump.
Task 9: Installing Exterior Smart Freeze Sensors
Reactive measures are often too late. Integrating smart home technology allows you to monitor temperature spikes in vulnerable areas (like a crawlspace or near the main water valve).
- The Tech: Install Wi-Fi or Z-Wave temperature sensors that alert your phone when ambient temps drop below 34°F.
- Further Reading: For a comprehensive look at automating your home's defense, read The Ultimate Dfw Homeowners Guide To Fall Proofing Your Home With Smart Tech.
Phase 4: Vegetation and Structural Load Management
Landscaping affects the structure of your home more than you might realize. Winter brings ice loads that turn weak branches into projectiles.
Task 10: Structural Pruning for Ice Load vs. Aesthetic Trimming
Most fall pruning is for looks. Structural pruning focuses on removing "v-crotch" stems and long, horizontal limbs that cannot support the weight of ice.
- The Guideline: Remove deadwood and limbs that overhang the roof or power lines.
- The Nuance: Focus on thinning the canopy to reduce wind resistance and weight leverage.
Resource: DFW Fall Landscaping Guide for Low Water Yards
Once you have managed the structural risks of your current vegetation, consider planning for the spring or replacing high-risk plants with hardier options. For specific recommendations on resilient planting, consult The Ultimate Dfw Fall Landscaping Guide What To Plant For A Low Water Beautiful Yard.
Moving From Reactive Repairs to Proactive Care
The difference between a stressful winter filled with emergency calls and a peaceful season lies in proactive preparation. By addressing these 10 overlooked tasks—ranging from sealing concrete joints to inspecting weep holes—you are securing your home's financial value and structural integrity. Winter damage is rarely an accident; it is usually the result of a small, missed vulnerability that physics eventually exploited. Take the time now to secure your perimeter.